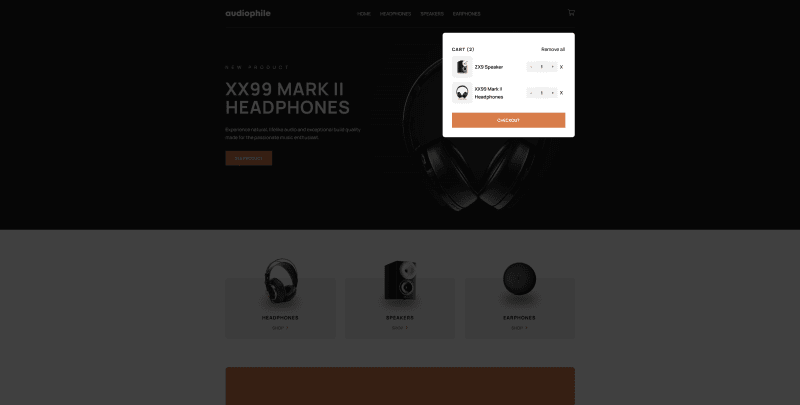
Creating a mini cart in Shopify
In this article we’ll be creating a mini cart in shopify, which will use the Shopify Ajax API to add, update and remove items to a dropdown cart in the header.
View the Github Gist
There are four main objectives to this article:
- Show/Hide Mini Cart
- Get all products in the basket and display them in the mini cart
- Update the quantities of items in the mini cart
- Remove items from the mini cart
Showing and hiding the mini cart
We’ll start by simply adding the functionality to hide and show the mini cart when the cart icon is clicked in the header.
The following are the HTML elements in my header file. There is also a div element with the class of, overlay in the body, which will be displayed behind the mini cart and close it once clicked.
<button class="mini-cart__trigger">
    <img src="{{ 'icon-cart.svg' | asset_url }}" alt="Cart icon">
</button>

<div class="mini-cart">
    <div class="mini-cart__items">
        {% comment %} Output cart items here {% endcomment %}
    </div>
    <a href="{{ routes.cart_url }}" class="button">Checkout</a>
</div>
Create a JavaScript file called, mini-cart.js and added the following JavaScript. You can see what the JavaScript does by reading the comments.
/**
 * Get reference to the mini-cart, mini-cart__trigger and overlay DOM
 * elements.
 */
const miniCart = document.querySelector('.mini-cart');
const miniCartTrigger = document.querySelector('.mini-cart__trigger');
const overlay = document.querySelector('.overlay');

/**
 * When the user clicks the mini-cart__trigger element add classes to the
 * overlay and mini-cart elements to show them.
 */
miniCartTrigger.addEventListener('click', () => {
    overlay.classList.add('overlay--show');
    miniCart.classList.add('mini-cart--show');
});

/**
 * When the user clicks the overlay element remove classes from the mini-cart
 * and overlay to hide them again.
 */
overlay.addEventListener('click', () => {
    overlay.classList.remove('overlay--show');
    miniCart.classList.remove('mini-cart--show');
});
Getting cart items and display them in the mini cart
To get all cart items from the Shopify Ajax API send a GET request using the fetch API to the /{locale}/cart.js route. The comments will explain what is happening.
/**
 * Sends a GET request to the '/{locale}/cart.js' route of the Shopify Ajax
 * API, returns the response as JSON and then passes the data to the
 * renderCart function, which outputs the content.
 */
fetch(window.Shopify.routes.root + 'cart.js')
    .then(response => response.json())
    .then(data => {
        // Loop through items and attach them to the DOM
        renderCart(data);
    })
    .catch(err => console.log(err));
Next we’ll create the renderCart function, which outputs the contents to the DOM.
/**
 * Outputs cart items and content in the DOM.
 */
function renderCart(data) {
    // Get mini cart title element where item count will be displayed
    const miniCartTitle = document.querySelector('.mini-cart__title');
    // Output the cart title with total items
    miniCartTitle.innerText = `CART (${data.item_count})`;

    // Get DOM element where the cart items will be attached
    const miniCartItems = document.querySelector('.mini-cart__items');
    // Clear HTML in the mini cart items
    miniCartItems.innerHTML = '';

    // Loop through cart items and attach them to the mini-cart__items element
    if (data.items.length > 0) {
        data.items.forEach(item => {
            miniCartItems.innerHTML += `
                <div class="mini-cart__item">
                    <div class="item__details">
                        <img src="${item.featured_image.url}" alt="${item.featured_image.alt}">
                        <span>${item.product_title}</span>
                    </div>
                    <div class="item__actions">
                        <div class="quantity-input">
                            <button type="button" class="minus">-</button>
                            <input type="hidden" class="item__line-key" value="${item.key}">
                            <input type="text" class="item__quantity" min="1" value="${item.quantity}">
                            <button type="button" class="plus">+</button>
                        </div>
                        <button class="item__remove" data-line-key="${item.key}">X</button>
                    </div>
                </div>
            `;
        });
    } else {
        miniCartItems.innerHTML = '<p class="mini-cart__empty">Cart is empty</p>';
    }

    // Call the handleQuantityInputs which gets the quantity inputs and attaches events
    handleQuantityInputs();
    // Call the handleRemoveItem which gets the item__remove elements and attaches events
    handleRemoveItem();
}
What this does is get the .mini-cart__title element and outputs the cart title, with the cart items count in parentheses. Then it gets the .mini-cart__items element, clears any previous HTML inside it, and then loops through the cart items.
After this it then calls the handleQuantityInputs function, which gets the quantity input elements and attaches events to them (which we will see a bit later).
Finally it calls the handleRemoveItem function which gets the .item__remove elements and attaches events them as well.
Next we’ll look at the handleQuantityInput() function. This function is responsible for getting references to all the .quantity-input elements within the mini cart, and then attaching click events to the .plus and .minus buttons and updating the items quantity in the cart.
/**
 * Attaches event listeners to the quantity input buttons, and
 * updates the value of the quantity input field.
 */
function handleQuantityInputs() {
    // Get a refernce to any quantity inputs
    const qtyInputEls = document.querySelectorAll('.mini-cart .quantity-input');

    // If there are any then loop through them and attach event listeners
    if (qtyInputEls.length > 0) {
        qtyInputEls.forEach(input => {
            // Get references to the plus and minus buttons
            let plusBtn = input.querySelector('.plus');
            let minusBtn = input.querySelector('.minus');
            // Get the quantity value
            let quantity = input.querySelector('.item__quantity').value;
            // Get the line item's key
            let lineKey = input.querySelector('.item__line-key').value;

            // Increase the quantity input value
            plusBtn.addEventListener('click', () => {
                // Increase the quantity value
                quantity++;
                // Calls the updateItemQuantity function which sends an Ajax request to update the items cart quantity
                updateItemQuantity(lineKey, quantity);
            });

            // Decrease the quantity input value, making sure it doesn't go below 1
            minusBtn.addEventListener('click', () => {
                // Decrease the quantity value
                quantity--;
                // Calls the updateItemQuantity function which sends an Ajax request to update the items cart quantity
                updateItemQuantity(lineKey, quantity);
            });
        });
    }
}
When clicking either the plus or minus button we’re changing the value of the quantity variable then calling a function called updateItemQuantity, which sends a request to the Ajax api and updates the quantity for the line item.
Here is the code for the updateItemQuantity function.
/**
 * Sends a request to the Ajax API to update the quantity of the line item.
 */
function updateItemQuantity(lineKey, value) {
    fetch(window.Shopify.routes.root + 'cart/change.js', {
        method: 'POST',
        headers: {
            'Accept': 'application/json',
            'Content-Type': 'application/json'
        },
        body: JSON.stringify({
            'id': lineKey,
            'quantity': parseInt(value)
        })
    })
    .then(response => response.json())
    .then(data => {
        renderCart(data);
    });
}
Then we’ll add the functionality to remove an item from the cart when the ‘X’ button is clicked. For this we’ll create a function called, handleRemoveItem. This function will get a reference to each items remove button, attach a click event handler, get the item’s key from the buttons dataset, and then use the updateItemQuantity function. We can remove an item from the cart by setting its quantity to 0.
/**
 * Sends a request to the Ajax api, updating the selected items quantity
 * to 0, which will remove it from the cart.
 */
function handleRemoveItem(lineKey, value) {
    const removeItemButton = document.querySelectorAll('.item__remove');

    removeItemButton.forEach(button => {
        // Get the line item key from the buttons data attribute
        let lineKey = button.dataset.lineKey;

        button.addEventListener('click', () => {
            // Update the item quantity to 0 in the cart to remove it
            updateItemQuantity(lineKey, 0);
        });
    });
}
Finally we can clear all cart items by sending a request to the cart/clear.js api route.
/**
 * Handle removing all cart items
 */
const removeAllButton = document.querySelector('.mini-cart__remove-all');
removeAllButton.addEventListener('click', () => {
    fetch(window.Shopify.routes.root + 'cart/clear.js', {
        method: 'post'
    })
    .then(response => response.json())
    .then(data => {
        renderCart(data);
    });
});